I have been blogging for 9 years now and during this time, I’ve had numerous people ask me how to start a blog easily (with Bluehost). Many people worry that’s it’s too complicated for their technical skills or that their writing copy doesn’t quite hit the mark. I’m here to tell you not to worry! I had none of these skills to begin with, but what I did know was that I was passionate about connecting with people and keen to have my own space in the online world.
Some of the technical stuff can be a bit scary for an outright beginner, which is why I thought you might appreciate a simple step-by-step guide. This guide will hopefully take the mystery and the unknown out of blogging and let you see, quite clearly, that it is a much simpler process than you would imagine! Just follow the steps in order!
1. DECIDE ON A DOMAIN NAME
A domain name is what users will type into their web browser’s search bar to navigate to your site. For example, “teacherstoolkitblog.com” is this website’s domain name.
Brainstorm lots of different ideas, and then choose your favorite. You might need different variations or backups of your domain name in case someone else has already claimed that domain. From Bluehost:
“Short names that are easy to remember perform the best. It’s also best practice to choose a domain name that closely resembles your business name. Some people also use keywords in their domain name to help visitors easily find them in search engines. Your domain name can use letter, numbers and hyphens but not special characters”.
2. PICK YOUR PLATFORM
There’s lots of different platforms (Weebly, SquareSpace, Wix and Blogger) that you can use to build your blog, but my best recommendation is WordPress.com. It is the golden standard in website design and will allow you the flexibility you need to build a great blog.
If you’re going with WordPress, you don’t need to set up anything at this point. You’ll do that after you pick a web host.
3. PURCHASE YOUR WEB HOSTING & DOMAIN NAME
You can do both of these in one step – much less confusing!
A Web Host provides a place for your website to ‘live’. It’s where all the deep code of your website is housed, and while you don’t need to know deep code to set it up, every website has to have one!
I personally use Blueost for my online presence. Here’s a few reasons why I love them:
- Great customer service – Bluehost support teams are quick and extremely helpful! If I cannot figure out something on the backend of my website, I can quickly go to the Bluehost chat help and talk with a representative within minutes. The representative has always either walked me through how to do the task myself or has simply done it for me! This is a huge plus for first time website owners!
- Cheap rates, but good service – Bluehost is one of the best “bang for your buck” web hosting out there. It’s well-priced, but your site isn’t going to be down all of the time like you might get with other low-rate website hosts.
- Easy, clear setup & instructions – Bluehost’s own website design is clear and simple, so I can find what I need to do simply and easily (like installing WordPress)!
- There are other options, of course, and you should do research based on what your blog’s needs may be. But suffice to say, I use Bluehost and recommend to anyone who asks – my experience has always been a positive one.
To sign up for your domain name and website hosting at BlueHost, click here.
Here’s what the process looks like:
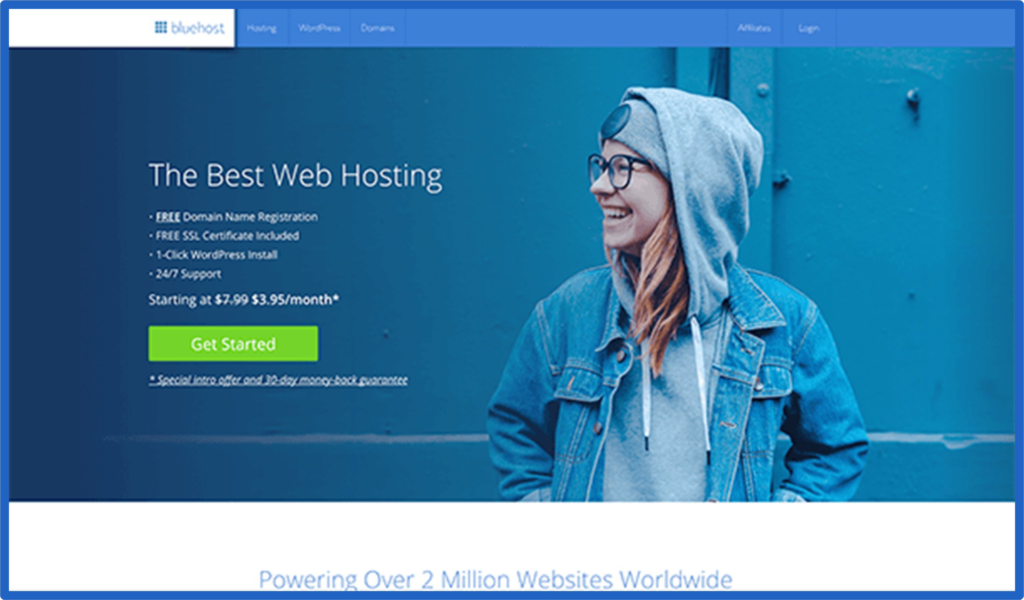
Click on the green ‘Get Started’ button.
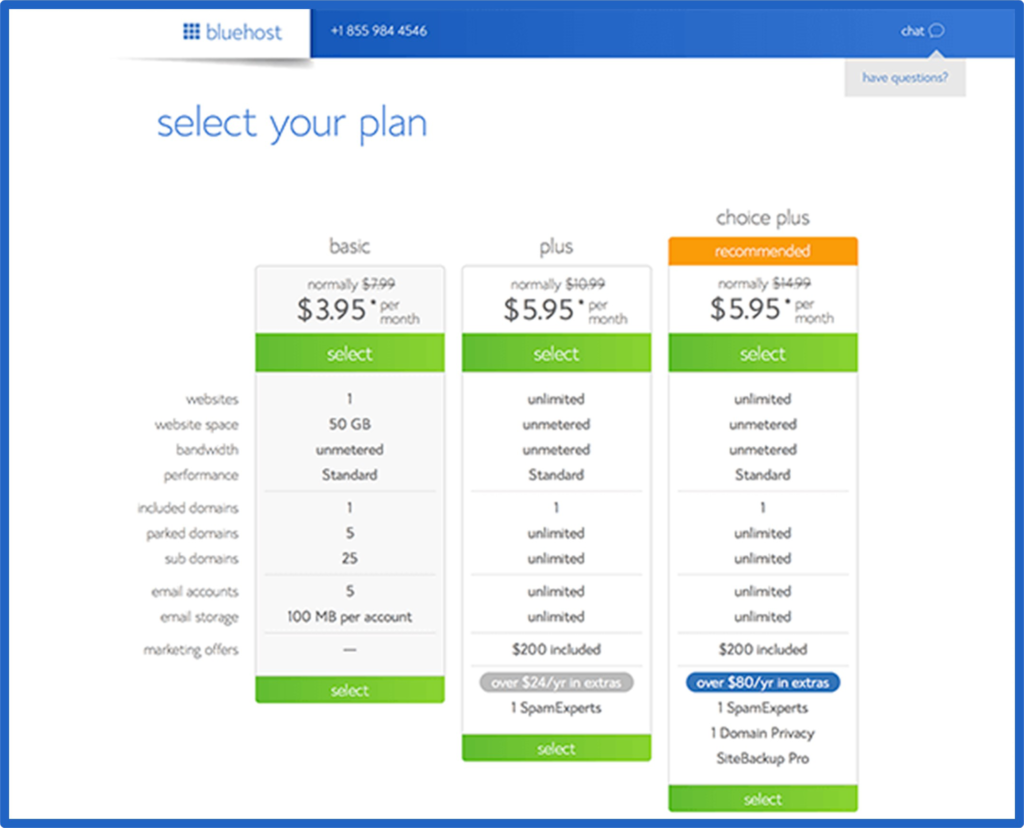
Select your plan. Read what comes with all of the different options, but more likely than not, you’ll just need the basic package.
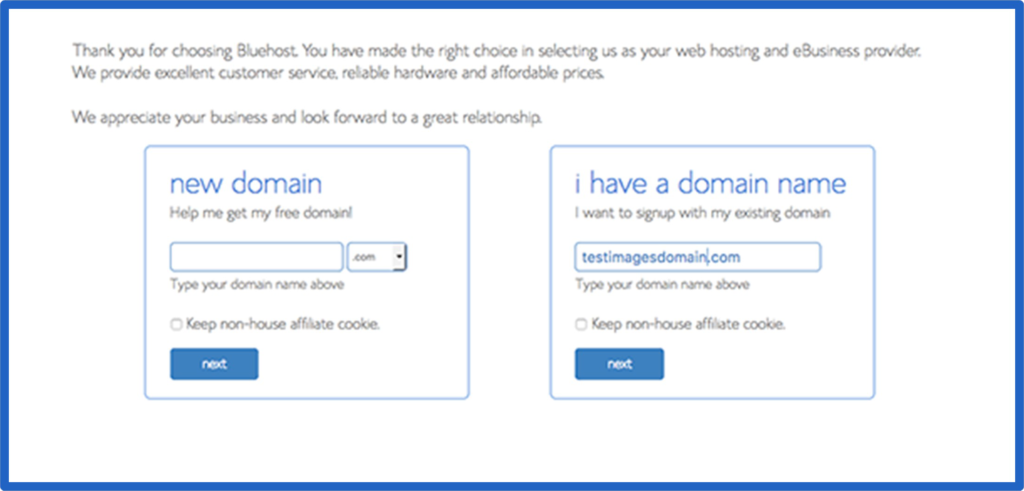
In the “New Domain” box, type in your preferred domain name (the one you brainstormed earlier!)
Fill out the account information and choose any package extras you’d like. Now you’ve got the beginnings of a website!
4. INSTALL WORDPRESS
Next, install WordPress on your site. WordPress is what you will use to design and manage your website. Think of it as your website builder, where you select your web design layout and build out the content.
Bluehost makes this part super easy (not all other hosting services do!)
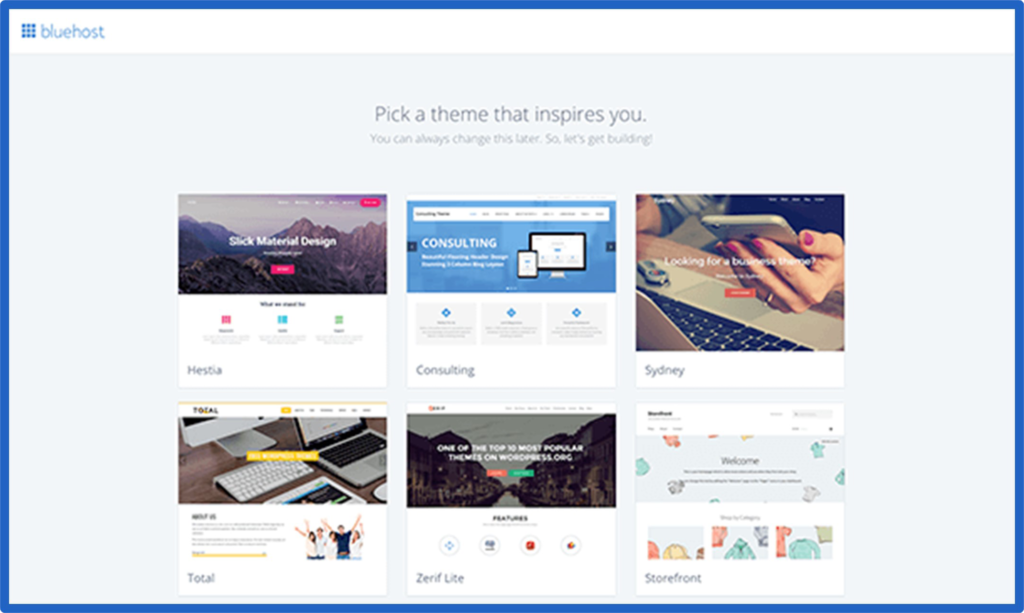
Bluehost will guide you to pick a theme. Pick the one you like best, but don’t worry — you can easily change this later or even upload one that you bought elsewhere.
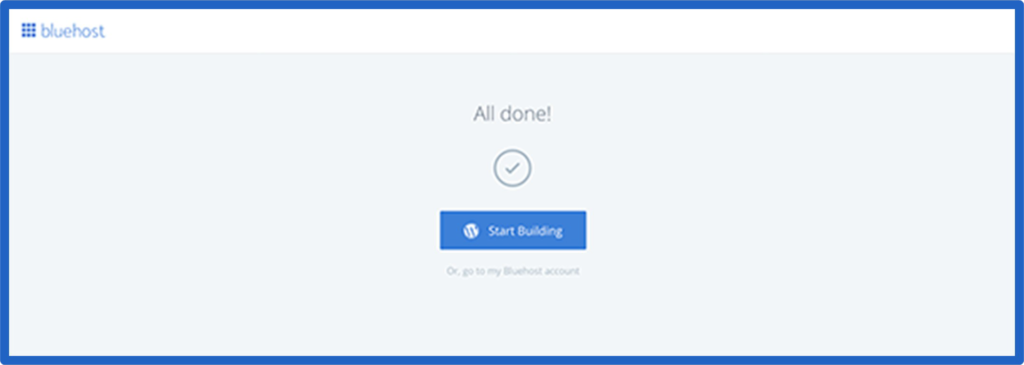
Click the “Start Building” button.
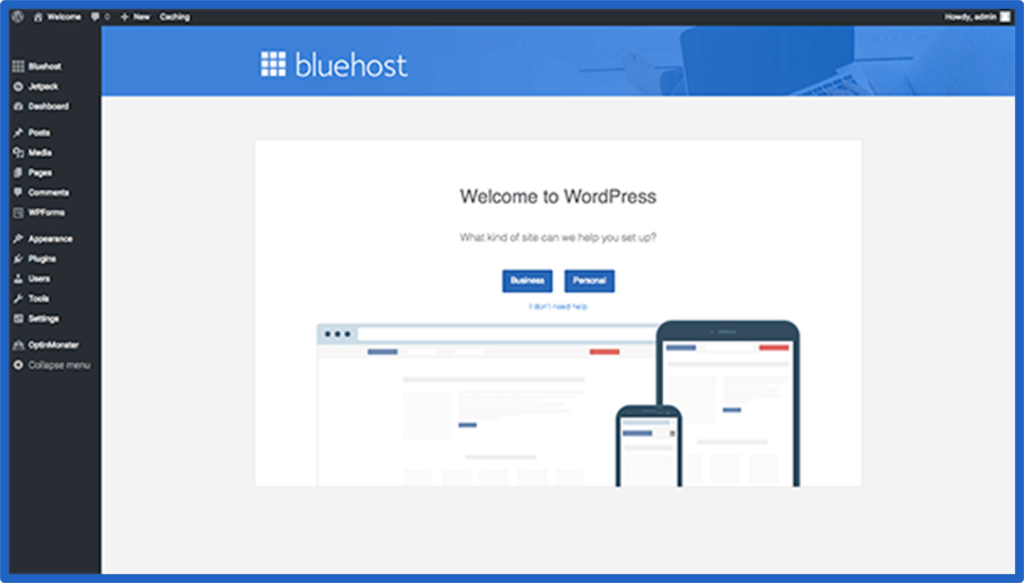
Choose “Business” or “Personal” when prompted. You’re all set up now! Congratulations!!
From this point, you’ll need to get familiar with the WordPress backend. Here are few basics to get you started.
- Your main navigation bar is on the left. If you need to find something — such as where to change your theme or add a new post — this is where you’ll find the page to do so.
- Pages and posts are different. Pages are those major spots on your website that will hardly ever change, such as your About page, Contact page, etc. Posts are where you will write your blog posts and major content. Unlike pages, you can organize posts into different categories and tags. To create a new page, you’ll select the Page button from the left hand navigation bar and then click “Add New,” where you’ll be brought to the page builder. To make a new post, follow the same process but select Post in the left hand navigation bar.
- Media is where you’ll upload your offsite content, such as pictures, videos, and PDFs.
- Appearance is where you find the option to select a different theme or upload one; create your website’s main navigation bar; and add widgets.
- Plugins are add-ons to your website that give you more functionality, such as adding fancy forms, installing your Instagram feed, or creating a popup on your website. There are literally thousands and thousands of plugins created from developers all over the world, so just do a quick Google search for one you might need!

That’s it – super simple! Let the fun of blogging begin!
CLICK HERE READ MORE BUSINESS BLOG POSTS

